Welcome Back
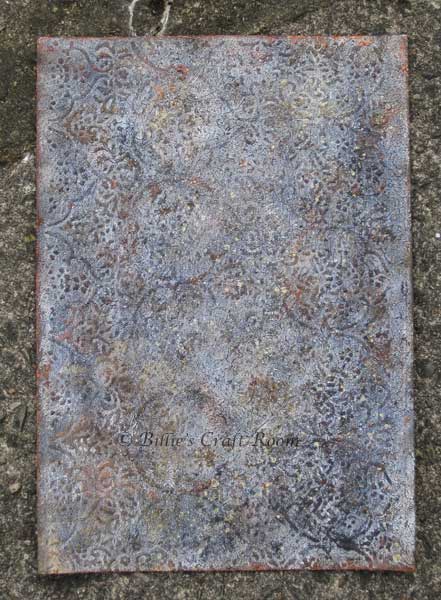
Texture paste is a fantastic way to add texture and dimension to art projects. Today’s tutorial will combine a variety of textures and colours in a simple but effective way to create a stone like effect. A great way to try texture paste for the first time.
You Will Need
- Daler Rowney: Texture Paste
- Embossed cardstock (I used 300 gsm card embossed in a Cuttlebug with my favorite folder)
- Jar of water
- Rag
- Sponge
- Royal Langnickel: K4 Palette knife
- Heavy weight cardstock
- Mount board or chip board
- Palette
- Winsor & Newton: Galleria Acrylic Paint; Paynes Grey, Burnt Sienna, Raw Umber
Method
- You will need a piece of dark embossed cardstock. I used a piece of 300 gsm card, which I embossed using a Cuttlebug die cutting machine and my favorite embossing folder. You could also use textured wall paper if you wish. (see my other videos for how to emboss cardstock. I’ll add link at the end).
- Apply a layer of texture paste over the whole of the embossed surface of the card. You don’t need too heavy an application, you still want to be able to see the embossing through it.
- While the paste is still wet, apply bubble wrap over the card stock and pull it up off the piece, this adds light texture. For a less uniform pattern, you could also use plastic bag to dab on to the surface.
- Allow the paste to dry overnight. Drying time may be faster if you have a thin application or are in a warm climate. Do not force the paste dry with a heat gun. (Oh ok, just a little but only if you have a gentle one and DON’T over heat it.)
- Apply paynes grey gently over the high areas of the embossing, this will bring out the pattern and also the texture.
- Allow each colour to dry before you add the next or they will blend rather than layer
- In a few places add some Burnt Sienna
- In a few places add some Raw umber, this is also useful to tone down any overly bright areas.
When you are happy with the look, allow all the layers to dry fully and then glue the finished piece onto sturdy card such as mount board or chip board.
Options/Added Extras
For a more distressed darker look, add extra Raw Umber around the edges of the board.
If you find it gets out of control and you have heavier applications of colours that you don’t like (yes this happened to me! when I tried this on a larger piece). Water down your Paynes Grey on the palette and apply a light colour wash over the piece. Dab into it using the rag, to vary the depth of tone.
Here’s what that does to your piece.
Experiment with different tools to apply your texture paste and different mark making items to vary the textures you get. It’s so much fun to put a layer down and see what you can do with it. The texture paste is quite forgiving as long as you put it onto a sturdy surface. Use it on mountboard to have more ‘fiddle’ time, without the tearing the card apart. I do sometimes experiment till a card gives up (not always intentionally) but that’s a great way to learn.
Here’s the book I made with my panel to store my sketches in.
Have fun experimenting and I’d love to see what you create with texture paste, do leave me a comment and show me what you have made.
Links
- Daler Rowney
- Texture Paste Review
Best wishes and thanks for reading see you soon
Billie 🙂


